How to transfer a domain away from GoDaddy to ETNHost?
Here at ETNHost, we recommend that you keep your domain name where you host your website. It is easier to manage, fewer passwords to worry about, better security, and last but not least this way you get a piece of mind. You will receive regular notifications from us through e-mail when the renewal date for your domain name is due and you will not miss to renew the domain name and risk your website to become inaccessible.
Extra:
Once the domain name is transferred to us, you will get one year of a free domain name renewal as a bonus.
Transfer of domain names may take anywhere between 3 and 10 days until completion. Before initiating a domain name transfer of a domain name registered with GoDaddy, you will need to make sure that the following conditions apply:
The domain must be more than 60 days old. This is not an ETNHost, nor GoDaddy, specific rule, but rather a rule implemented by ICANN, the organization that governs domain registrations.
The domain has been Unlocked for transfer from GoDaddy.
The domain is showing your current e-mail for the admin contact in the whois as that is where the authorization email will be sent.
The domain must not be too close to its expiration date, as GoDaddy will normally auto renew domains 15 days prior to expiration.
Notes:
The 60-day holding period only applies to domain transfers between registrar providers when a domain is either newly registered or recently transferred. If you just ended site services with another provider (without transferring the domain to another registrar), then the 60-day hold shouldn't apply at all. If the hold did apply, it still shouldn't prevent you from pointing it to another host service to start up a new site.
To prepare your domain name to be transferred away from GoDaddy you must engage in the following steps:
Unlock your domain name. To do that there are several steps that you need to follow:
Notes:
The view of the account depends largely on how you access your DNS manager.
If you are looking at your account in Card View then follow these instructions:
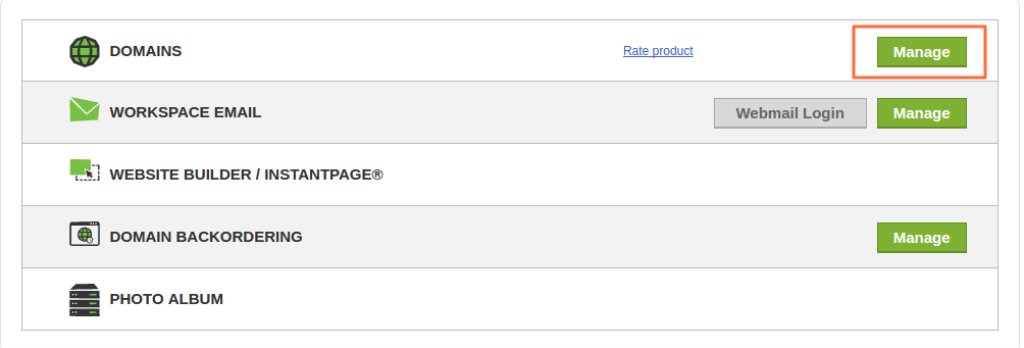
Find Domains and click on Manage next to it.
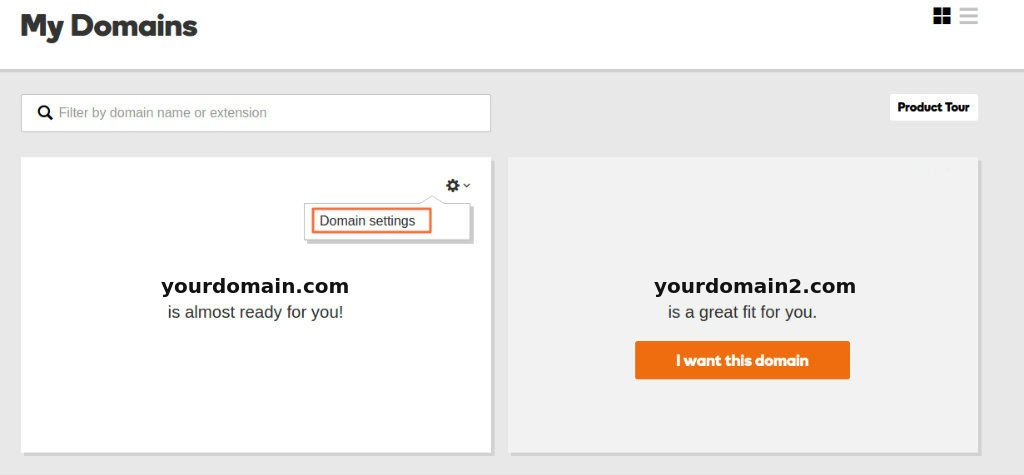
Choose the domain name you want to unlock and then click on Settings and then select Domain Settings.
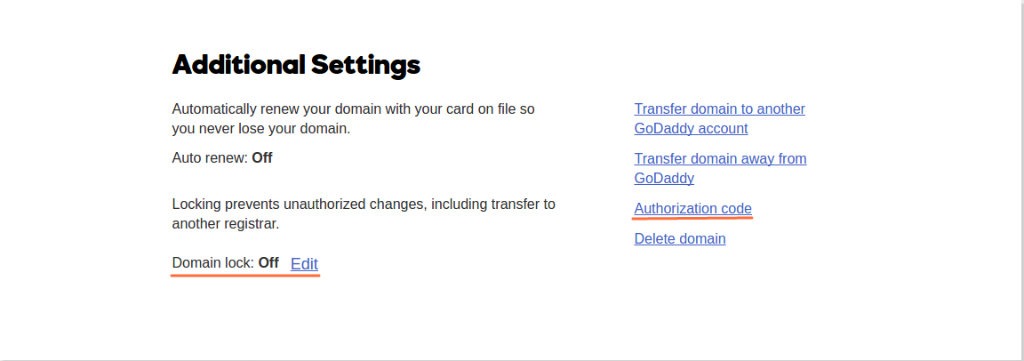
Find Additional Settings and click on Edit, which is located right under it.
Click on the Off button.
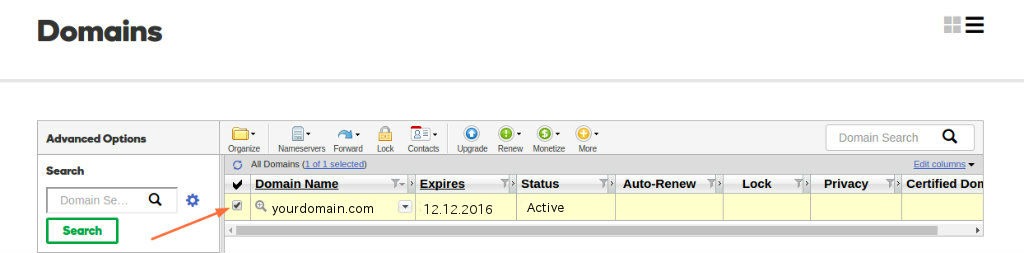
If you are looking at your account in List View then follow these instructions:
Find Domains and click on Manage next to it.
Choose the domain name you want to unlock .
Find the Lock section and click on Edit, which is located right under it.
Click on the Off button and then click on Save.
Turn off the Private Registration of your domain
You need to cancel your private registration because your personal information must be publicly available for the transfer.
If you are looking at your account in Card View then follow these instructions:
Find Domains and click on Manage next to it.
Choose the domain name you want to use and then click on Settings and then select Domain Settings.
Under Contact Information find the Remove Privacy and click on it, then select Yes, Remove Privacy.
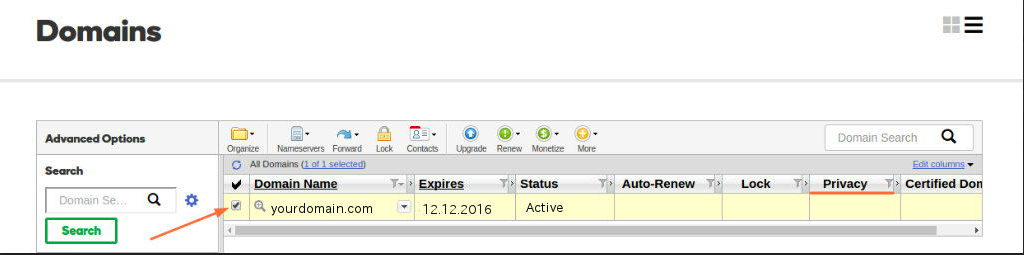
If you are looking at your account in List View then follow these instructions:
Find Domains and click on Manage next to it.
Select the domain you want to transfer and next to it, right under the Privacy column click on Manage.
Find the Remove Privacy link and click on it and then select Yes, Remove Privacy.
Update your contact information if needed
If you are looking at your account in Card View then follow these instructions:
Find Domains and click on Manage next to it.
Choose the domain name you want to use and then click on Settings and then select Domain Settings.
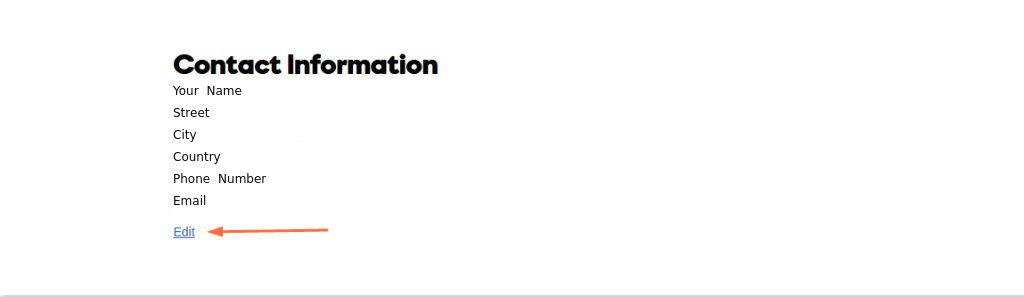
Find Contact Information and click on Edit.
Here you have two options – to edit all contacts to edit each contact individually:
To edit All Contacts all you have to do is to enter the Contact, Address, Phone, and Email information you want to change and then click on the OK button.
If you want to edit each individual contact you must uncheck the Use for all contact types box and then enter the information you need to update. Click on the OK button.
If you are looking at your account in List View then follow these instructions:
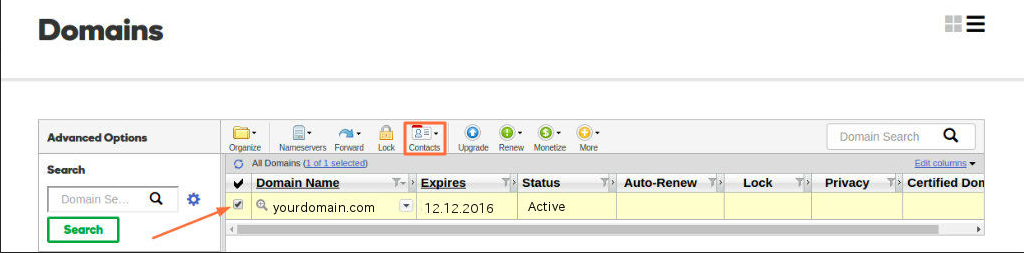
Find Domains and click on Manage next to it.
Choose the domain name you want to use.
Click on Contacts and then choose Contact Information.
Click the tab for the specific contact type you need to change or check the Use for all contact types box.
Enter the information you want to update.
Click on the OK button.
When the contact information is changed you will be displayed the following legal agreements from which you will have to choose one:
I certify that the organization listed above is the registrant and I am authorized to act on their behalf.
I certify that I am either the individual named above or authorized to act on their behalf.
I have read and agree to the terms and conditions below and understand that the domain name cannot be transferred within the next 60 days
Obtain the EPP code
If you are looking at your account in Card View then follow these instructions:
Find Domains and click on Manage next to it.
Choose the domain name you want to use and then click on Settings and then select Domain Settings.
Find the Additional Settings section and click on the Authorization code link. The EPP code will be automatically emailed to the administrative contact you have listed.
If you are looking at your account in List View then follow these instructions:
Find Domains and click on Manage next to it.
Choose the domain you want to transfer.
Find the Settings tab and go to the Authorization Code section at the bottom.
Click on the Email my code option and then click on Send.
After completing the preparation, let some time pass (a day or so) before you initiate the transfer. You can also check the Whois info for your domain. You can do this at http://www.whois.net or http://whois.domaintools.com or similar sites, to make sure everything shows up and is correct.
Once ready, you can now submit a transfer request for the domain:
Proceed with posting an order for the domain name transfer by clicking on the Domains tab.
Upon the request of the domain name transfer, you will need to enter the Authorization/EPP code. Once the code is entered then the process will begin.
Note that you will also receive a transfer approval email to the listed administrative contact for the domain. After the transfer is confirmed the losing registrar (GoDaddy) has 7 days to release the domain. If everything is ok, the domain will be released and added to the Domains Section in your ETNHost account. Please note that you may also receive an email from GoDaddy asking you to reject the transfer and stay with them. In most cases you can simply ignore that email.
Notes:
Once you start a domain name transfer you must remember that you can't change your DNS, Whois info, contact info and so on.
Be Smarter!
Ready to use what you've learned? Awesome. Enjoy increased power, flexibility, and control for your websites with us.Start now