After the connection to the server is settled, you are ready to upload your site!
We will again use FileZilla for example. To get started with FileZilla,click on the FileZilla icon.
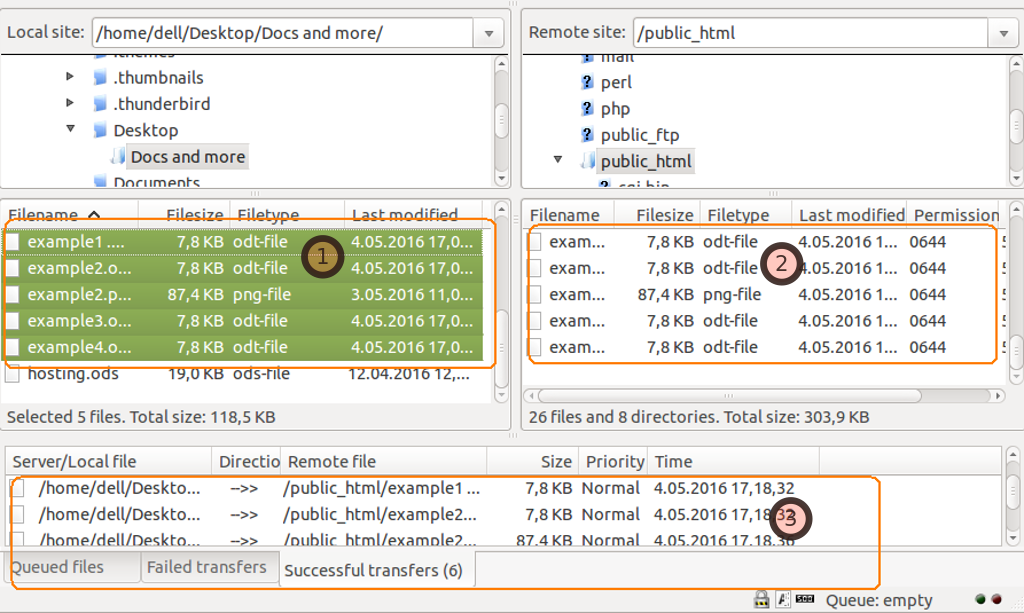
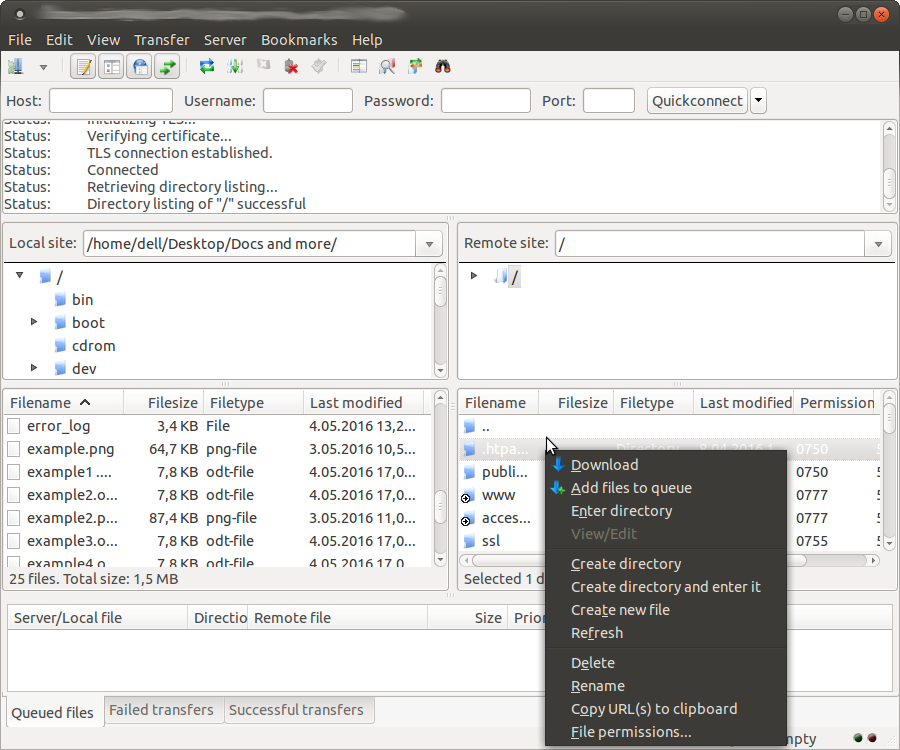
As you have probably noticed, the client is divided into several windows. On your left side, under the message window, there are the files and folders currently located on your local machine, while on the right, the remote directories are listed.

Select the file/s you wish to upload and then specify the desired location on the server. By dragging and dropping you can easily move the data from one side to the other. One of the reasons FTP clients like FileZilla are so widely spread is that they make it possible for multiple files to be transferred at a time. Just highlight the items and again simply drag them to the appropriate location. (See: 1)
There is no need to refresh, restart of things like that – once the transfer ends, you will be able to see the files in their new home. In fact, whatever uploading method you choose, it makes a copy of the information , rather than actually move it to the remote section. (See: 2)

There are several tasks you can perform within the client. Right click will open the drop menu.

At the very bottom, you are able to monitor the status of your queued files, successful and failed transfers. (See: 3)
So, basically, that`s it. The FileZilla client is simply designed, with a clear and easy interface and so are some of the other most popular programs like CuteFTP, SmartFtp, FireFTP. Anyways, we from ETNHost will always help you with any struggles you may have.